Community Planning: Methods
Mapping
- description
- more detail
- more pictures
Mapping is an effective non-verbal way of finding out how people view their area. It is a good way to gather and present site-specific data, understand differences in perception and stimulate debate as a basis for joint planning.
Individuals or groups create physical maps of their neighbourhood or city using pen and paper, lines in the sand, cloth, chalk or other materials to hand.
A framework or theme is normally provided to focus people's thoughts, eg places you visit frequently, landmarks, boundaries, places you dislike, things you would like to see.
The maps are discussed and analysed as a basis for understanding differing viewpoints and planning what should be done.
Records of maps and debates are made for future reference.
Photocredits
top: Easton, Bristol, UK, 1993, Nick Wates
bottom: West Bengal, India, 1990, Robert Chambers
top: Easton, Bristol, UK, 1993, Nick Wates
bottom: West Bengal, India, 1990, Robert Chambers
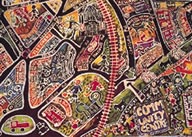
Art map
Part of a 'parish map' used as a postcard ('Parish mapping' in glossary).
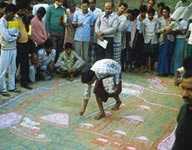
Community mapping
Making a village map on the ground using powder. Community mapping allows the less articulate to express their views
Tips
- Use symbols rather than words if participants are unable to read.
- Using tracing paper to build up layers can be useful, getting different information on each layer.
- Mapping the same thing at different times is a good way of monitoring progress.
- Maps made or left in a public place provide a good focus for discussion. Particularly good in schools children love maps.
- Maps can be very attractive. With some thought they can become permanent exhibits or even made into postcards!
Costs
- Depends on materials used and cost of facilitation. Need not cost anything.
Group mapping process
- Purpose
Decide what the map or maps should show (eg land use, hazards, resources, mobility, social facilities) and the best display method. - People
Gather people who know the area and are willing to share their knowledge. Decide whether to work individually or in groups. - Place and materials
Choose a suitable place (ground, table, wall) and materials (sticks, stones, seeds, pencils, felt-tips, chalk). - Map making
Facilitators might help people get started but then withdraw. - Discussion
Presentation of maps. Discussion on comparisons and lessons drawn. Notes of discussion made on flipchart or in notebook. - Record
Make a record of the maps on A4 paper for later use and/or take photos. - Planning
Use the maps to start developing proposals
Running time: 1-2 hours
Process also works for diagramming. Replace word 'map' with 'diagram'. (see also Diagrams.)
Map types and uses
Activity map
Shows where people do things, which places they visit. Useful for planning future facilities.
Art map
Aims to be a work of art for displaying at exhibitions, making into postcards and so on.
Hazard map
Shows vulnerability to natural or environmental hazards and identifies risks and capacities. Useful for disaster mitigation.
Land use and resources map
Shows what happens where.
Mental map
Shows how people perceive their area (as opposed to being geographically accurate). Useful insight into perceptions.
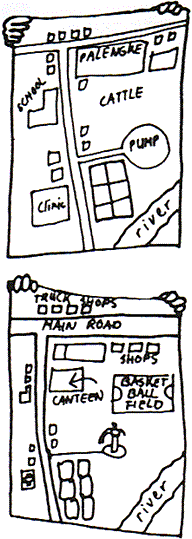
Different perspectives
Two maps of the same place, one drawn by a woman, one by a man. Guess which is which. (Maps redrawn from originals.)

Using symbols and colour
Mapping various aspects of a community's capacity to cope with natural disasters helps planning to reduce their impact.
Photocredits
above:Igbalangao, Panay Islans, Philippines, 1995, Nick Hall
above:Igbalangao, Panay Islans, Philippines, 1995, Nick Hall